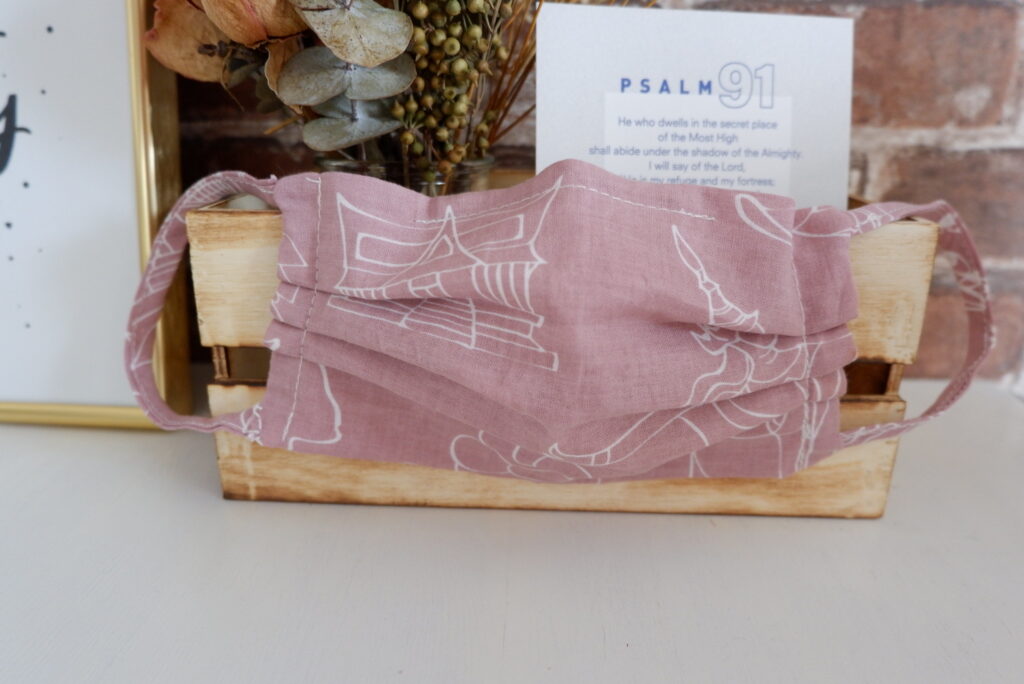
In Singapore, it is mandatory for all to wear a face mask the moment we step out of our houses from 15 April 2020 onwards. But we can go mask-free while engaging in strenuous exercises like running or jogging. If we flout this rule, we will be fined $300. For second-time offenders, it will be $1,000. That’s how strict our government is! With this new measure implemented, I decided that it was time to make my own face mask. We might have to wear face masks every time we are out of our house until this coronavirus is eradicated.
Previously, our government has given out free surgical masks to each household and reusable masks for each resident. It is definitely more eco-friendly to be using reusable masks because we can use it again and again. It might not be effective to filter out the smallest particle or micro-organism but it is still better than not wearing a mask at all. In my opinion, any protective covering placed over your mouth and nose is good enough. As long as it fits snugly to your face, it is a good mask. Since you have to wash it every time after use, it might not dry as quickly for your next use. Thus, it is only wise to have a few reusable masks at hand. So, here’s how you can sew your own mask with or without a sewing machine. You can even sew your own mask by hand.
What you’ll need:
1 piece of breathable cotton cloth ( 40 cm by 20 cm)
2 Elastic bands (16 cm long) or 2 pieces of cloth strips (18 cm by 4.5 cm)
1 pair of fabric scissors
Sewing Machine (optional)
Needle and thread
Gift wire tie (7 cm) (optional) (to make the flexible nose piece)
A few clips or pins
1. Cut and prepare all the cloth and other materials you need.

Make sure that you are using a piece of cotton cloth which is breathable and light.
2. Fold the cloth into half then sew along the hemline but leave a 5-cm gap in the middle.

Fold the piece of cloth into half, with the wrong side facing towards you. Then stitch along the hem, about 1 cm away from the edge of the cloth. Don’t forget to leave a 5-cm gap in the middle. This gap will serve as the opening for you to turn the mask inside out and also, an opening for you to slot in the mask filter.

3. Open up the seams and iron it flat.

4. Make the mask loops using the same cotton fabric by cutting 2 pieces of 18-cm bias strips

This is a similar technique to make a pipeline for your blouse. And I find that the mask tends to look better with loops made from the same fabric, as compared to using black or white elastic loops. It’s a little more work but it is worth it.
Bias strips (cut diagonally from the selvedge or cloth edge) are more stretchable than strips which are cut parallel to the selvedge. So I highly recommend you to cut bias strips if you have extra fabric to work with.
How to fold and iron the bias strips?
Follow the below step-by-step instructions on how to fold and sew the mask loops!


5. You are almost there! Hand stitch the loops to the corners of the face mask then stitch along the sides.

Hide the loops into the mask and then stitch the mask loops to the mask. Lastly, sew along the sides of the mask like the one shown below.

You should create a hem like the one shown below. The mask loops should be hidden inside.

6. Turn the face mask right side out through the opening.

Just be really gentle when you are turning the mask right side out through the filter opening. You will probably end up with this bundle as shown below but not to worry, just continue to unfold.

Tadaah! You will get something like this. It will look crumple so remember to iron the creases away.

The side with the opening should be facing inwards (the side which the mask is in contact with your nose and mouth).

7. Insert the gift wire tie into the face mask. This creates your flexible nose piece.

8. To prevent the wire tie from moving around, stitch along the side of the mask to create a slot for the wire tie to be inserted.

I actually find that the flexible nose piece is unnecessary because the face mask is actually quite fitting. Thus, this is an optional step.
9. Lastly, fold three staggered pleats and secure it with clips. Then stitch across the pleats to hold them down.

I did not follow any exact measurements. I just fold the pleats and make sure they look even then iron it down. Then I clip the pleats so that it is easier for me to sew.
10. Then mask up!

It is quite fitting and I like that the mask is very comfortable to wear for long hours. You can be creative and use patterned fabrics to create your mask which can match your outfit!
Hope you find this DIY Face mask tutorial useful. Stay safe everyone!
Need some stay home ideas or inspirations? Check out my articles on how to spend your time wisely during this COVID-19 pandemic outbreak.


